How To Build A Wooden Dog Bed Frame: Easy DIY Guide
Learn how to build a wooden dog bed frame with simple tools and materials. Follow this easy DIY guide to create a sturdy, stylish bed your dog will love.
Build a wooden dog bed frame by measuring your dog, cutting sturdy lumber, and securing a safe, raised base.
A well-built wooden dog bed frame gives your pet a clean, supportive place to rest while adding warmth and style to your home. With careful measurements, strong joints, smooth edges, and a washable mattress, you can create a frame that fits your dog instead of forcing your dog to fit a store-bought bed.
This guide explains how to build a wooden dog bed frame from start to finish. It covers wood choice, tools, measurements, cutting, assembly, finishing, safety, and common mistakes. The process is simple enough for a beginner, yet the details matter because a dog bed must handle movement, chewing, moisture, and daily use.
Why Build a Wooden Dog Bed Frame?
A wooden dog bed frame can last for years when it is made with sound joints and protected wood. It also lifts the mattress away from cold floors, dust, and small spills. For older dogs, a low frame can offer support without creating a high step.
The best part is customization. You can match the frame to your room, choose a washable cushion, and adjust the size for a puppy, small dog, or large breed. A homemade frame can also cost less than a premium designer bed.
A wooden dog bed frame should still meet your dog’s needs. A nervous dog may prefer a low, open design. A chewer may need thick wood and strong screws. A senior dog may need a wide entry and a firm but soft mattress.
Choose the Right Design and Size
Before buying wood, measure your dog while it lies in its favorite sleeping position. Measure from nose to tail, then add at least 6 inches for small dogs and 8 to 12 inches for medium or large dogs.
For a dog that curls up, a square or round cushion may work well. For a dog that stretches out, choose a longer rectangular frame. The bed should allow your dog to turn, stretch, and settle without hanging over the edge.
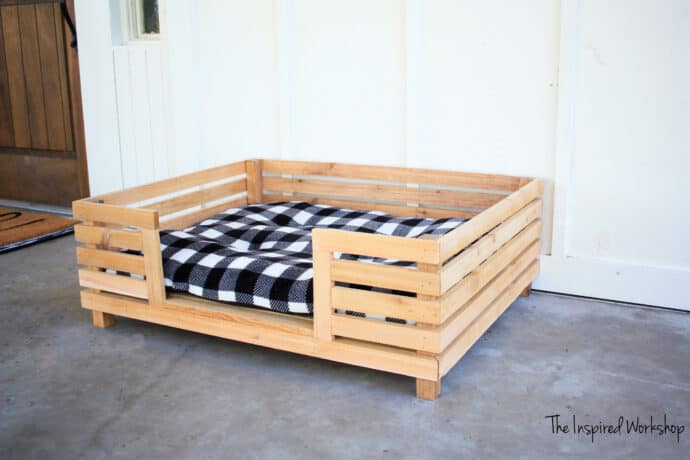
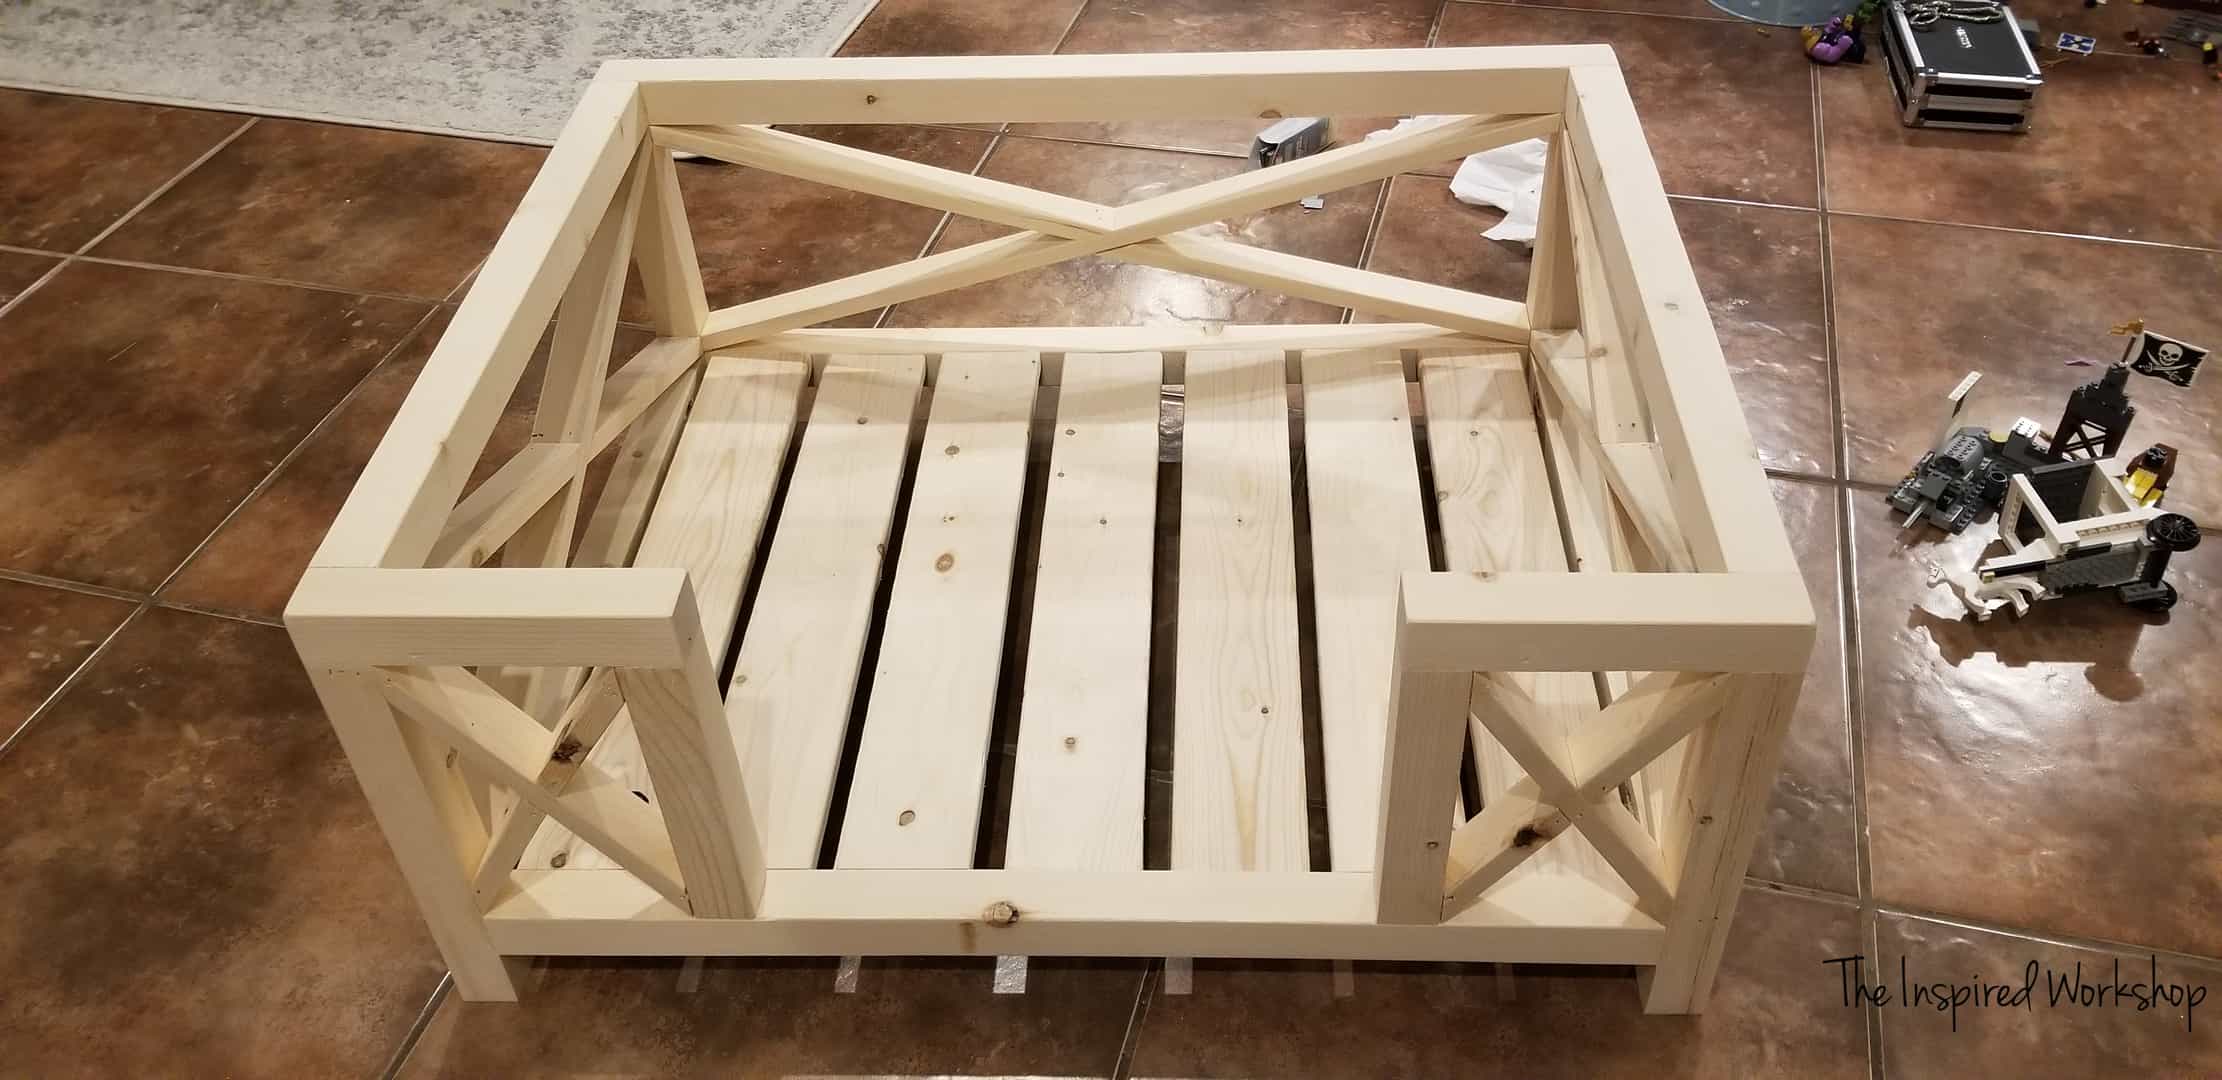
A simple design uses four side rails, four legs, and a slatted or solid support surface. For most homes, a low rectangular frame is the easiest option because it is stable, easy to clean, and simple to repair.
Use these general inside dimensions as a starting point:
• Small dogs: 24 by 18 inches
• Medium dogs: 30 by 24 inches
• Large dogs: 42 by 30 inches
• Extra-large dogs: 48 by 36 inches or more
These sizes are only guides. Your dog’s sleeping style matters more than breed labels. Add the cushion thickness to your measurements when planning the frame height.
A practical frame height is 4 to 8 inches from the floor. Keep the entry low if your dog has arthritis, hip problems, or weak legs. The American Kennel Club and veterinary professionals commonly recommend supportive, easy-to-access resting areas for older pets, but your veterinarian should guide decisions for a dog with joint disease.

Materials and Tools You Will Need
A basic wooden dog bed frame does not require a large workshop. Most parts can be cut with a circular saw, miter saw, or hand saw. A drill and a measuring tape are more important than expensive equipment.
Recommended materials
• Two 1 by 6 inch boards for the long side rails
• Two 1 by 6 inch boards for the short side rails
• Four 2 by 2 inch boards for the legs
• One by 2 inch boards for interior support cleats
• Wood screws rated for outdoor or furniture use
• Wood glue labeled for interior woodworking
• Sandpaper in 80, 120, and 180 grit
• A washable dog mattress or cushion
• Water-based, pet-safe paint, stain, or clear finish
Choose kiln-dried pine, poplar, maple, or another stable wood. Pine is affordable and easy to cut, while hardwoods resist dents better. Avoid wood that is damp, split, badly warped, or covered in unknown chemicals.
Do not use treated lumber for an indoor dog bed frame. Pressure-treated wood may contain chemicals that are not suitable for close, repeated contact with pets. Reclaimed wood can look attractive, but inspect it for nails, mold, lead paint, oil, and other contaminants.
Essential tools
• Measuring tape and pencil
• Carpenter’s square
• Saw
• Drill and drill bits
• Countersink bit
• Clamps
• Sanding block or orbital sander
• Safety glasses and hearing protection
• Dust mask for cutting and sanding
A countersink bit helps the screw heads sit below the wood surface. This reduces scratches and prevents your dog from touching sharp metal.

Plan the Measurements
Accurate planning is the key to a clean wooden dog bed frame. Start with the cushion, not the lumber. If the cushion measures 30 by 24 inches, make the inside of the frame about 30 by 24 inches or slightly larger.
For a simple frame, the long rails run between the legs. The short rails fit between the long rails. This layout affects your cut list.
For example, if the inside length is 30 inches and you use 1½ inch wide legs at both ends, each long rail should be about 33 inches long. If the inside width is 24 inches, each short rail should be about 24 inches long when it fits between the long rails.
Wood sizes often differ from their stated sizes. A board sold as a 1 by 6 usually measures about ¾ by 5½ inches after milling. Measure the actual boards before cutting.
Write down every part before you start:
• Two long side rails
• Two short side rails
• Four legs
• Two or more inner support cleats
• Slats or a support panel
Cut a test piece from scrap wood first. This small step can prevent a large mistake. I have found that most frame problems begin with a rushed measurement, not a difficult joint.

Cut and Prepare the Wood
Set the boards on a stable work surface. Mark each cut with a square so the line runs at a true 90-degree angle. Label each piece as you cut it, such as “left rail” or “front leg.”
Make all matching pieces together when possible. Cutting both short rails from the same setup helps keep them equal. Equal parts make the frame easier to square.
After cutting, inspect every piece for:
• Splits near the ends
• Loose knots
• Sharp corners
• Rough saw marks
• Bowed or twisted boards
Sand the cut edges with 80 grit paper first. Move to 120 grit, then finish with 180 grit. Round the outside corners slightly. A dog may rub against the frame, so sharp corners have no place on a pet bed.
Do not rely on paint to hide rough wood. Finish sanding before assembly, especially inside corners that may become hard to reach later.

Assemble the Wooden Dog Bed Frame
The assembly process is straightforward when you work on a flat surface. Take your time to keep the frame square.
Step 1: Build the side sections
Place two legs upright and position one long rail between them. Keep the top edges level. Apply a thin layer of wood glue to the joint, drill pilot holes, and drive two screws into each end.
Repeat this process for the second long rail section. Do not skip the pilot holes. They reduce splitting, especially in pine and other soft woods.
Step 2: Join the short rails
Stand the two long sections upright. Place a short rail between the legs at each end. Check that the top edges line up, then glue, drill, and screw the joints.
Measure the diagonals from corner to corner. If both diagonal measurements match, the frame is square. If they differ, push the frame gently until the measurements match before the glue sets.
Step 3: Add support cleats
Install support cleats along the inside of the long rails. The cleats should sit low enough to support the slats while leaving room for the cushion.
Use screws every 8 to 12 inches. Add glue if the cleats are wood to wood and will not need removal. Avoid placing screws where they can touch the cushion.
Step 4: Install the support surface
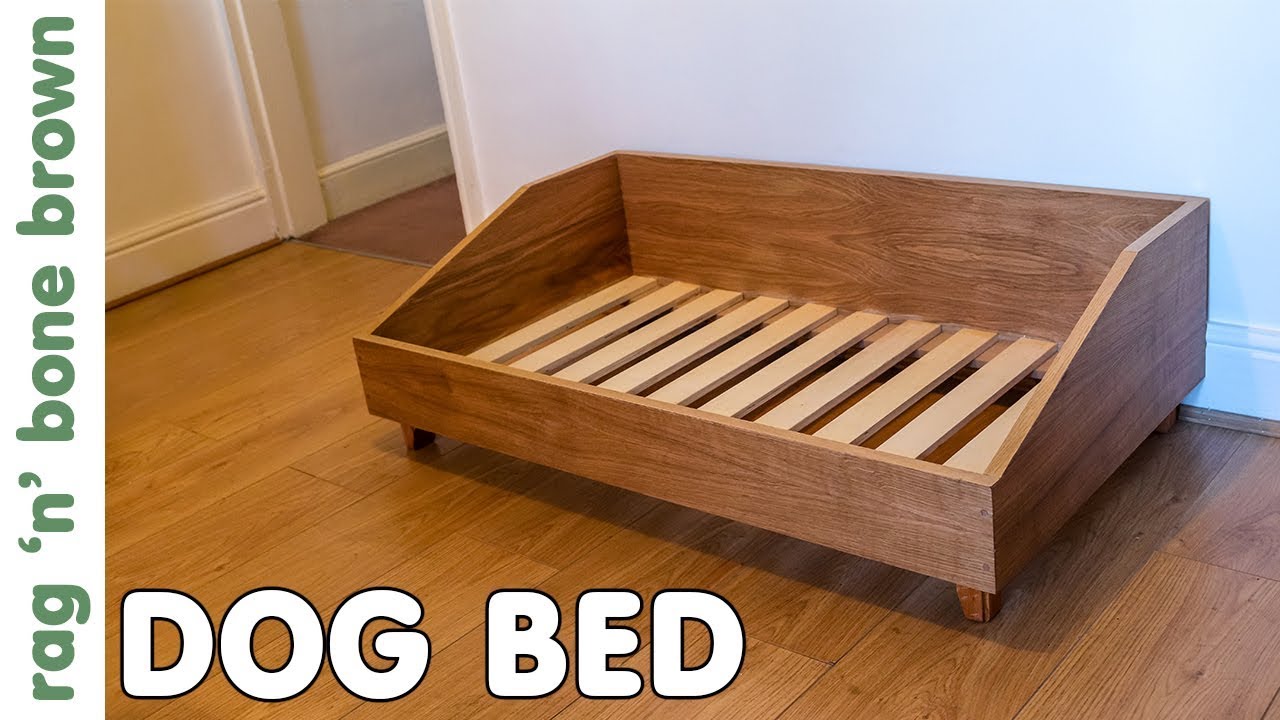
You can use several wooden slats or one plywood panel. Slats improve airflow and make the bed lighter. A plywood panel offers stronger, more even support for a thick orthopedic mattress.
Leave small, even gaps between slats. The gaps should be narrow enough that a paw cannot become trapped. Sand every slat before installation.
For a large dog, add a center support rail or extra legs. A frame that feels solid under your hand may still flex under a heavy dog jumping onto it.

Secure the Frame and Check Its Strength
A wooden dog bed frame should not rock, twist, or make loud creaking sounds. Place it on the floor and press down on each corner. If it moves, check the joints and confirm that the floor is level.
Use these checks before applying finish:
• Confirm that every screw is tight
• Make sure no screw tip passes through the wood
• Check that the frame sits flat
• Measure both diagonals again
• Push from each side to test for wobble
• Inspect all edges for splinters
If the frame wobbles, add corner blocks inside the joints. Small triangular blocks can greatly improve strength without changing the outer appearance.
For a large or active dog, use thicker rails, stronger screws, and a center brace. A dog bed is furniture, but it also acts like a small platform. It must handle jumping, shifting weight, and repeated impact.
Sand, Paint, and Seal the Frame
Sanding is a safety step, not just a cosmetic step. Run a clean cloth over the wood after sanding. If the cloth catches, the surface still needs work.
Choose a water-based finish made for indoor furniture. Look for a product that fully cures into a hard film and follow the label’s drying and curing time. “Low odor” does not always mean safe while wet, so keep your dog away during application and curing.
You can leave the wood natural, use a clear coat, or apply paint. A clear finish shows the grain, while paint lets the bed match your furniture.
Follow these finishing steps:
-
Sand the assembled frame with 120 grit paper.
-
Remove dust with a vacuum and clean cloth.
-
Apply a thin coat of finish.
-
Allow the finish to dry as directed.
-
Sand lightly if the label recommends it.
-
Apply a second coat for better protection.
Do not let your dog use the bed until the finish has fully cured. Dry to the touch is not always the same as fully cured. When in doubt, wait longer and ventilate the room well.

Add a Comfortable and Washable Mattress
The frame supports the mattress, but the mattress supports your dog. Choose a cushion that matches your dog’s size and health needs.
Memory foam or orthopedic foam can help distribute pressure for older dogs. However, foam should have a washable cover, and it should not become too soft for a dog that struggles to stand.
Look for:
• A snug fit inside the frame
• A removable, machine-washable cover
• Water-resistant fabric for puppies or senior dogs
• Enough thickness to keep the dog off the hard support surface
• A filling that holds its shape
The cushion should not slide around. If it moves, add a nonslip mat beneath it. Avoid loose straps, exposed zippers, buttons, or decorative pieces that your dog could chew or swallow.
I once tested a frame with a cushion that was slightly too small. The empty gap collected fur and allowed the cushion to shift. A close fit made cleaning easier and made the whole bed feel more stable.
Pet Safety and Common Mistakes
The most important part of learning how to build a wooden dog bed frame is understanding that strength and safety come before appearance. A beautiful bed is not successful if it splinters, tips, or exposes toxic materials.
Avoid these common mistakes:
• Using untreated but rough wood without sanding
• Making the frame too tall for a senior dog
• Leaving screw heads exposed
• Using weak brad nails as the only fastener
• Choosing a cushion that slides out
• Applying finish without allowing full curing time
• Building a large frame without a center brace
• Leaving wide gaps between slats
• Using reclaimed wood without checking its history
Inspect the frame every few months. Look for loose screws, cracked rails, damaged finish, moisture, and chew marks. Repair small problems before they become structural failures.
If your dog is a strong chewer, no wooden dog bed frame is completely chew-proof. Use solid wood, avoid small detachable parts, and supervise the first few days. Replace any part that becomes sharp or weak.
How to Maintain a Wooden Dog Bed Frame
Good care helps a wooden dog bed frame stay clean and stable. Vacuum hair from the cushion and frame each week. Wash the cover according to its care label.
Wipe the wood with a damp cloth, then dry it. Do not soak the frame. Excess moisture can swell wood, loosen joints, and create an environment where mold may grow.
Every month, check:
• Leg joints
• Rail screws
• Slat spacing
• Corner edges
• Cushion support
• Signs of urine or water damage
If an accident reaches the wood, clean it promptly with a pet-safe cleaner. Test any cleaner on a hidden area first. Avoid mixing cleaning products, especially those containing bleach and ammonia.
A light coat of finish may need renewal after several years. Sand only the damaged area when possible, and keep your dog away until the new finish cures fully.
Cost, Time, and Design Options
A basic wooden dog bed frame may take a beginner one afternoon to build, plus drying time for glue and finish. The cost depends on the wood, hardware, cushion, and tools you already own.
You can reduce the cost by using standard pine and a simple slatted design. Hardwood, custom trim, storage drawers, and premium orthopedic cushions increase the price.
Useful design upgrades include:
• A removable side rail for older dogs
• Storage space beneath the bed
• Locking casters for easy movement
• A hinged top for toy storage
• A lower entry cutout
• A raised rim for dogs that like to lean
• A waterproof mattress liner
Keep the design practical. Extra trim can trap hair and make cleaning harder. A simple frame with smooth surfaces is often better than a highly decorated bed.
Frequently Asked Questions
How much wood do I need to build a wooden dog bed frame?
Most small and medium frames need four side rails, four legs, support cleats, and slats or a plywood base. Buy one extra board if possible, since warped wood or cutting errors can change the final amount.
What is the best wood for a wooden dog bed frame?
Pine is affordable, easy to cut, and suitable for many indoor beds. Maple, oak, and poplar offer greater hardness, but they cost more and may require stronger tools.
How high should a wooden dog bed frame be?
A height of 4 to 8 inches works well for many healthy dogs. Use a lower frame for puppies, small dogs, and pets with arthritis or mobility problems.
Should I use nails or screws for a wooden dog bed frame?
Screws provide a stronger and more serviceable connection than nails for most bed frames. Use pilot holes and countersink the screws so no sharp metal remains exposed.
Is a wooden dog bed frame safe for puppies?
Yes, if the frame has smooth edges, secure joints, safe materials, and no loose parts. Supervise puppies because chewing can damage wood and create splinters.
Can I use plywood for the bed base?
Yes, plywood works well as a solid support base. Choose a clean, quality panel, sand the edges, and make sure it is strong enough for your dog’s weight.
How do I stop the dog bed from sliding?
Place rubber feet or a nonslip mat under the legs. A nonslip liner under the cushion can also stop movement inside the frame.
Conclusion
Building a wooden dog bed frame is a practical project that combines simple cuts with careful planning. Measure the cushion first, choose safe and stable wood, sand every edge, secure the joints, and allow all finishes to cure before your dog uses the bed.
A low, sturdy frame with a washable cushion can improve comfort, simplify cleaning, and fit your home better than a standard pet bed. Start with a simple design, test the frame for strength, and adjust the size to your dog’s real sleeping habits.
Gather your measurements and tools, then build a comfortable resting place your dog will enjoy every day. Share your finished wooden dog bed frame or explore more pet-friendly woodworking projects for your next build.

Pet Care Writer & Researcher
Daniel writes practical guides on daily care, feeding, and safety, turning complex topics into simple, actionable advice.