How To Build A Dog Bunk Bed: Easy DIY Guide
Learn how to build a dog bunk bed with simple steps, safe materials, and practical tips for creating a cozy space your dogs will love.
Build a safe dog bunk bed with sturdy wood, careful measurements, smooth edges, and a stable design.
Learning how to build a dog bunk bed can save money and give your pets a cozy space that fits your home. This guide explains the design, tools, materials, measurements, assembly steps, and safety checks in simple terms. You will also learn from common DIY mistakes, so your finished bed feels more like a safe little den than a wobbly stack of boards.

Why Build a Dog Bunk Bed?
A dog bunk bed gives two pets their own sleeping spaces while using the same floor area. It works well in small homes, apartments, laundry rooms, and multi-dog households. The lower bunk suits older or less active dogs, while the upper bunk can serve a smaller dog that enjoys climbing.
Learning how to build a dog bunk bed also lets you choose the right size, height, fabric, and finish. Store-bought beds may not fit a large breed, a narrow room, or a dog with joint pain. A custom design can solve those problems.
The main benefits include:
• Better use of floor space
• Separate sleeping areas for two dogs
• Easy access to washable bedding
• A design that matches your home
• Lower cost than some specialty pet furniture
Still, a bunk bed is not right for every dog. Puppies, anxious dogs, large breeds, and pets with poor balance may be safer on the floor. Watch how your dog moves before choosing a raised design.

Plan the Dog Bunk Bed Before You Cut Wood
Good planning is the most important part of how to build a dog bunk bed. Measure your dogs while they are lying down in a relaxed position. Add at least 6 inches to both the length and width of each sleeping area.
For example, a dog that needs a 30-by-24-inch sleeping space may feel more comfortable on a 36-by-30-inch platform. The extra room lets the dog turn, stretch, and change position without falling against a rail.
Use these planning questions:
• How many dogs will use the bed?
• What is the weight of each dog?
• Can the dogs climb a ladder or ramp safely?
• Does the room have enough ceiling height?
• Will you remove the mattresses for washing?
• Should the lower bunk sit directly on the floor?
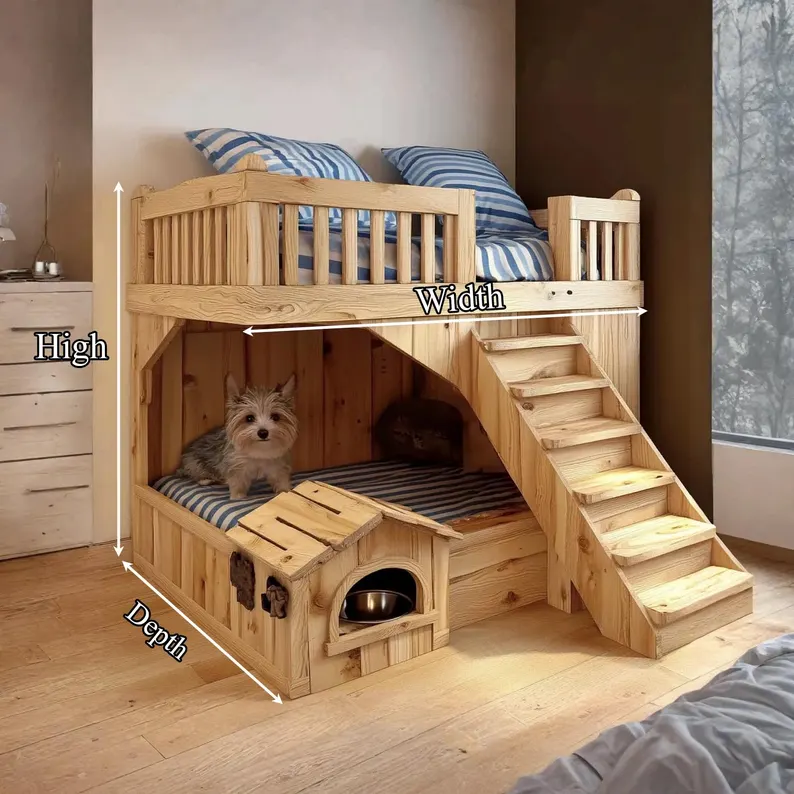
A useful design has two strong platforms, four support posts, a safe access point, and a guardrail around the upper bunk. Leave enough space between the levels for the lower dog to sit without hitting its head.
A lower bunk about 6 to 10 inches above the floor is often practical. The upper bunk height depends on your dog’s size and confidence. For many dogs, keeping the top sleeping surface 24 to 30 inches from the floor is safer than building a tall structure.

Choose Safe Materials and Tools
The materials you choose affect strength, comfort, and safety. For most indoor projects, kiln-dried lumber, plywood, and solid wood boards work well. Avoid wood with rot, deep cracks, loose knots, or signs of chemical treatment.
A basic materials list includes:
• 2-by-4 lumber for the frame
• 3/4-inch plywood for the platforms
• 1-by-4 or 1-by-6 boards for guardrails
• Wood screws designed for structural use
• Wood glue rated for interior projects
• Sandpaper in medium and fine grits
• Nontoxic paint or pet-safe wood finish
• Two washable dog mattresses
• Rubber feet or nonslip pads
Useful tools include:
• Tape measure
• Pencil and carpenter’s square
• Circular saw or table saw
• Drill and drill bits
• Countersink bit
• Clamps
• Level
• Stud finder, if attaching the bed to a wall
• Safety glasses and hearing protection
Choose screws that are long enough to hold the joint but not so long that they pass through the wood. Pre-drilling helps prevent split boards. This small step can make the frame much stronger and cleaner.
When learning how to build a dog bunk bed, avoid particleboard for the main frame. It can weaken when exposed to moisture and may crumble around screw holes. Plywood can work well for platforms, but the edges should be sanded and sealed.

Take Accurate Measurements
Measure twice and cut once. This old workshop rule prevents waste and protects the strength of the bed. Write each measurement on a simple cut list before you begin.
A sample bed for two small or medium dogs might use:
• Two platforms measuring 36 by 30 inches
• Four vertical posts measuring 26 inches
• Eight frame boards cut to match the platform length and width
• Two or four guardrail boards for the upper level
• One short ladder or ramp
These sizes are only examples. Your dog’s weight, mattress thickness, and room layout should guide the final dimensions.
Remember to include mattress thickness. If a mattress is 4 inches thick, a 6-inch guardrail leaves only 2 inches above the sleeping surface. That may not provide enough protection for a restless dog.
For the upper bunk, aim for a guardrail that rises at least 6 inches above the mattress. A deeper rail may be better for dogs that move during sleep. Do not create large gaps where a paw, leg, or head could become trapped.
How to Build a Dog Bunk Bed Step by Step
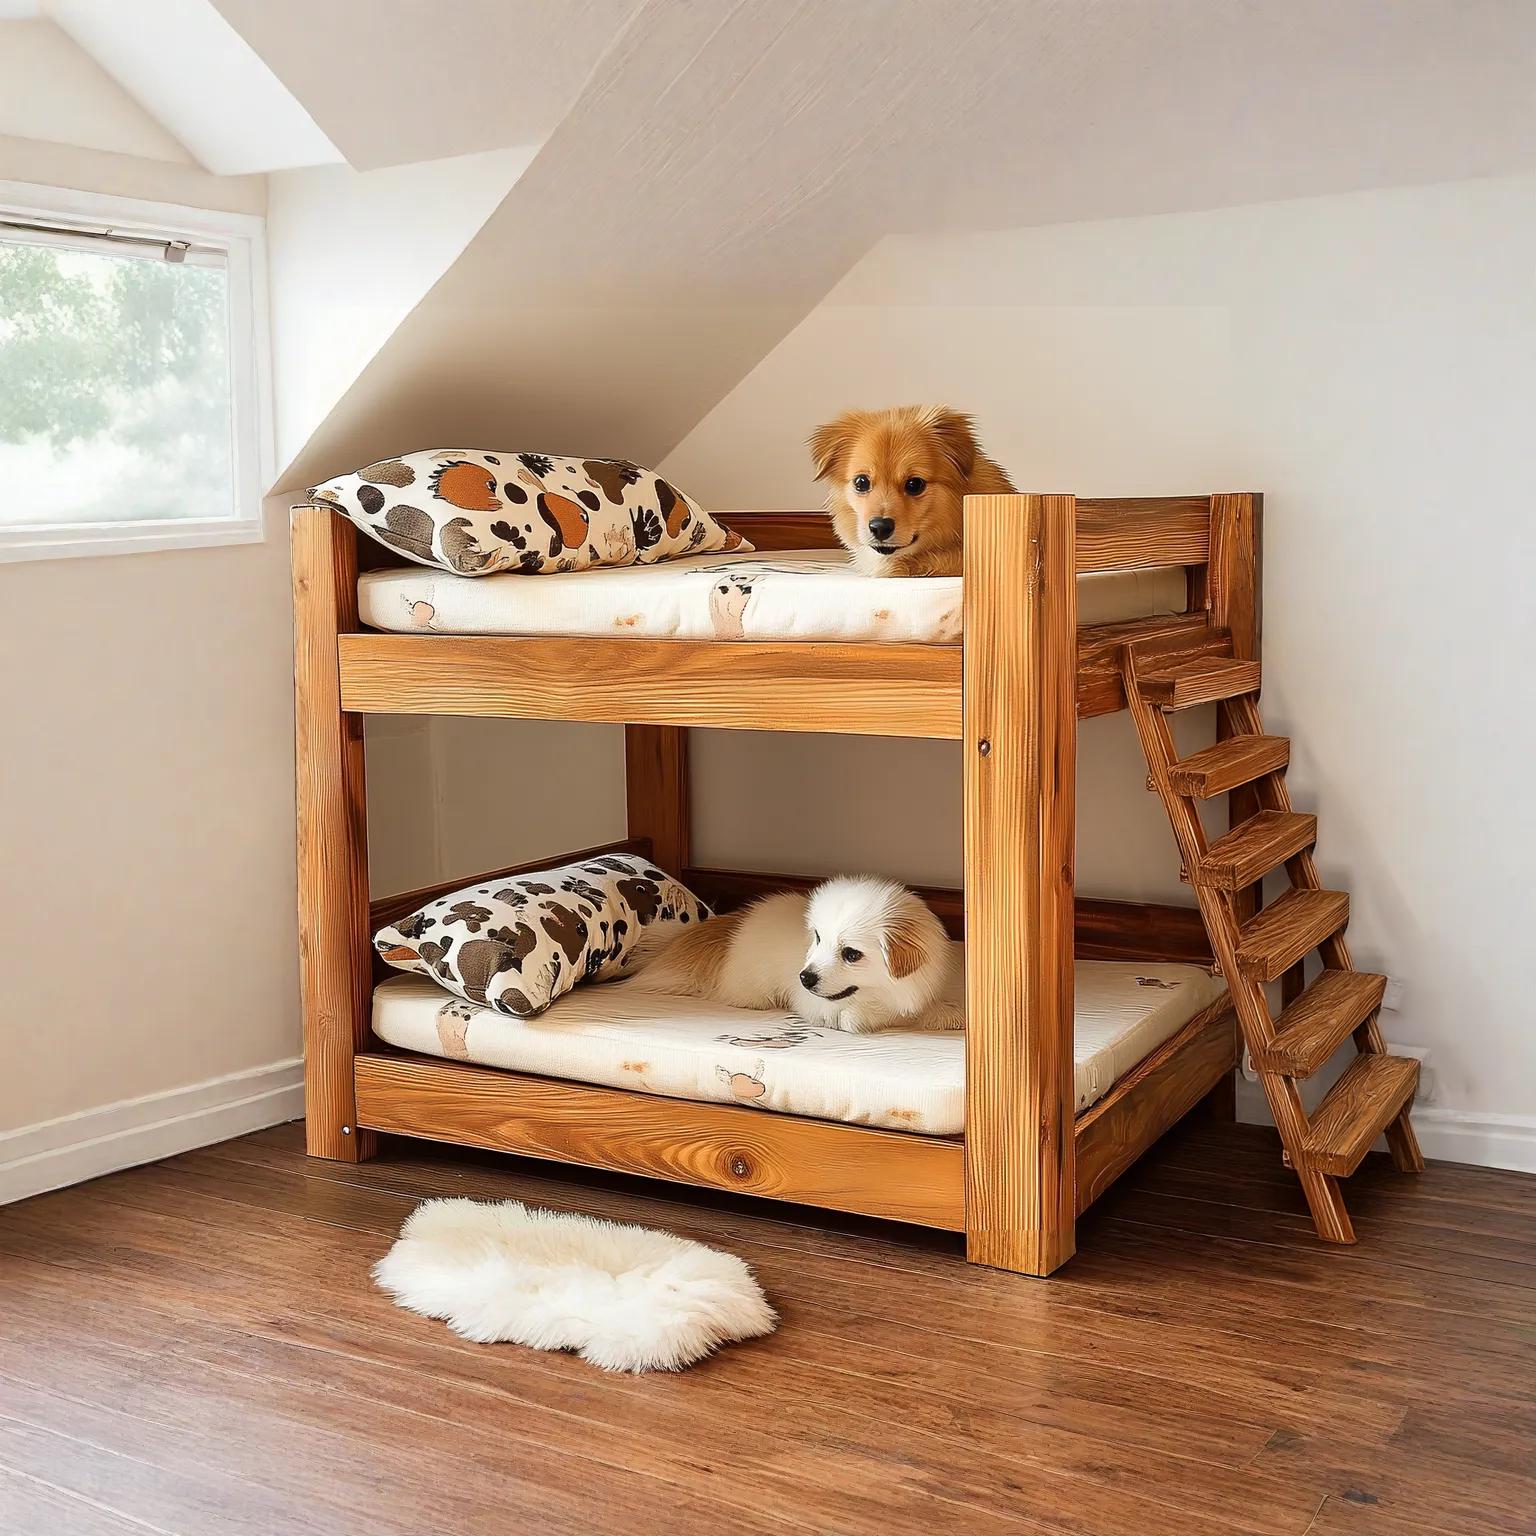
The following method creates a simple wooden bunk bed with two platforms. Adjust the size for your dogs, but keep the basic structure strong and level.
1. Cut and label each part
Cut the frame boards, posts, platforms, guardrails, and ladder pieces. Label each part with pencil on an area that will not be visible.
Check every cut with a square. A small angle error can grow as you assemble the frame. Lay the parts on the floor first to confirm that the pieces fit.
2. Build the lower platform frame
Make a rectangle from two long boards and two short boards. Apply a thin line of wood glue to each joint. Drill pilot holes, then drive in structural screws.
Add at least one center support beneath a wide platform. This support helps prevent sagging, especially when a heavy dog jumps onto the bed. For a large dog, use more supports or stronger lumber.
Place the plywood platform on top of the frame. Drill pilot holes around the edge and secure it with screws. Keep screw heads flush with the surface.
3. Build the upper platform frame
Repeat the same process for the upper platform. Make sure both frames have matching corners and support points.
Before attaching the upper level, place the lower frame on a flat surface. Use a level to check it from front to back and side to side. A level bed feels more stable and reduces stress on the joints.
4. Attach the support posts
Stand the four posts at the corners of the lower frame. Clamp each post in place. Check that the posts are straight before drilling.
Attach the lower frame to the posts with two screws at each connection. Then attach the upper frame at the planned height. Use a level again after each corner.
This is the stage where many DIY builders rush. Take your time. If one post leans, the upper bed may twist or rock.
5. Add center supports
Install center supports under both platforms if the bed is wide. These supports spread the dog’s weight across the frame.
A dog may climb, jump, or land hard on the platform. Static weight is not the only force to consider. Strong furniture must handle movement, not just a dog lying still.
6. Install the upper guardrail
Attach guardrails around the open sides of the upper bunk. Leave a controlled opening where the ladder or ramp meets the bed.
Round the top edges with sandpaper or a router. Never leave sharp corners near a dog’s face, paws, or tail.
A guardrail should keep the mattress in place and reduce the risk of a nighttime fall. It should not create a narrow pocket that could trap a dog.
7. Build a ladder or ramp
A ramp is often safer than a ladder for senior dogs or breeds prone to joint problems. A ladder may work for young, agile dogs, but its steps need a nonslip surface.
For a ramp, use a solid board with cleats spaced several inches apart. Cover the walking surface with outdoor carpet or another firmly attached nonslip material.
For a ladder, make each step wide enough for your dog’s paws. Secure the ladder to the bed so it cannot shift when the dog climbs.
8. Sand every surface
Sand the wood until it feels smooth to your hand. Pay close attention to corners, screw holes, platform edges, and guardrails.
Run a clean cloth over the surface. If the cloth catches, the wood may still have a splinter. Dogs explore with their noses and paws, so small rough spots matter.
9. Apply a safe finish
Use a water-based, low-odor finish that fully cures before your dog uses the bed. Follow the product’s drying and curing directions.
Do not rely only on the words “natural” or “green” on a label. Read the safety information and keep pets away during application. Good ventilation matters.
10. Add the mattresses and test the bed
Place a washable mattress on each platform. Check that the mattress cannot slide into a gap around the edges.
Before allowing your dog to use the bed, press down on each platform and gently push the frame from different sides. It should stay firm and quiet. If it rocks, stop and correct the problem.
Make the Bed Stable and Dog Safe
Safety should guide every part of how to build a dog bunk bed. A beautiful bed is not useful if it tips, splinters, or has a weak ladder.
Use these safety checks:
• Keep the base wide enough for the bed’s height.
• Add rubber feet to reduce sliding.
• Anchor the frame to a wall if it is tall or narrow.
• Use a level to check both platforms.
• Tighten all screws after the first test.
• Cover exposed bolts and sharp hardware.
• Avoid loose cords, ribbons, and small decorative pieces.
• Inspect the bed each month.
The American Veterinary Medical Association advises pet owners to reduce hazards in the home and seek veterinary guidance when a pet has mobility problems. That advice is important here. A raised bed can be comfortable, but it can also increase fall risk for dogs with arthritis, weakness, or poor vision.
Introduce the bed slowly. Place a favorite blanket on the lower level first. Give praise when your dog steps onto it. Never force a nervous dog up the ladder.
A practical lesson from many furniture projects is that wobble usually comes from the joints, not the wood. If the bed shifts, add corner braces, stronger screws, or a wall anchor. Do not solve the problem by simply adding more bedding.

Choose Between a Ladder and a Ramp
The access point can make or break a dog bunk bed. A ladder uses less room, but it demands more balance and coordination. A ramp takes more floor space but offers a gentler path.
Choose a ramp when your dog:
• Is older
• Has arthritis
• Has short legs
• Has poor balance
• Avoids stairs
• Has recently had surgery
Choose a ladder when your dog is agile, confident, and comfortable climbing. Add wide steps with a nonslip surface. Avoid smooth wood because it can become slippery from nail contact or loose bedding.
The incline also matters. A steep ramp may be harder to use than a short ladder. If space allows, make the ramp longer and less steep. Test it yourself with your hand before asking your dog to climb.
Add Comfort Without Creating Hazards
A dog bunk bed should support the body without trapping heat or blocking movement. Choose a mattress that fits the platform with little side-to-side movement.
Memory foam can provide comfort for some dogs, especially those with joint pain. However, foam should have a washable cover and must stay dry. Wet foam can hold odors and moisture.
Look for bedding that is:
• Washable
• Breathable
• Firm enough to support the dog
• Sized to fit the platform
• Free from loose zippers or small parts
Do not overfill the bed with blankets. Thick, loose bedding can cover guardrails or slide toward the ladder. Keep the sleeping surface neat and inspect it after your dog settles in.
For warm rooms, use a breathable pad. For cold rooms, add a washable blanket that your dog can move away from. Dogs regulate comfort by changing position, so they need space to do that.
Common Mistakes to Avoid
Many problems are easy to prevent when you know what to watch for. The most common mistake in how to build a dog bunk bed is designing for appearance before function.
Avoid these errors:
• Making the upper bunk too high
• Using weak screws or short nails
• Skipping center support
• Leaving rough edges
• Making ladder steps too narrow
• Using slippery paint or polish
• Forgetting mattress thickness
• Placing the bed near a hot radiator
• Ignoring signs of fear or pain
• Failing to anchor a tall frame
Another mistake is copying a plan without checking the dog’s size. A design made for a Chihuahua may fail under a Labrador’s weight. A design made for two small dogs may not provide enough room for two large dogs to turn and stretch.
Start with a simple design. Extra features can come later. Storage drawers, roofs, and decorative trim are less important than solid joints, safe access, and washable bedding.
Cost, Time, and Maintenance
The cost of how to build a dog bunk bed depends on wood prices, tools, mattress quality, and design. A simple bed may cost less than a large commercial model, especially if you already own a saw and drill.
Typical cost areas include:
• Lumber and plywood
• Screws and brackets
• Paint or finish
• Mattress pads
• Nonslip material
• Wall anchors
• Replacement bedding
A basic project may take one full day for cutting, assembly, sanding, and testing. Finishing can add extra time because paint and sealers need to cure.
Maintenance is simple but important. Wash the bedding often, wipe the frame with a mild pet-safe cleaner, and check the joints every few weeks. Look for loose screws, cracks, movement, dampness, or damaged nonslip material.
If the frame develops a serious crack or repeated wobble, stop using it until you repair it. A dog bunk bed should be treated like any other piece of furniture that carries weight.
How to Introduce Your Dog to the New Bed
Even a safe bed may scare a dog at first. The upper level can feel strange, and the ladder may move in a new way.
Use a calm introduction:
-
Place the bed in a familiar area.
-
Put your dog’s usual blanket on the lower platform.
-
Reward your dog for looking at or touching the bed.
-
Practice stepping onto the lower level.
-
Introduce the ramp or ladder while holding it steady.
-
Use small treats and praise.
-
Let your dog choose when to climb higher.
Keep the first sessions short. If your dog shakes, backs away, pants heavily, or refuses treats, lower the pressure. Some dogs will prefer the lower bunk, and that is perfectly fine.
Never lift a nervous dog onto the upper platform and leave it there. Trust grows through choice and repetition.
When a Dog Bunk Bed Is Not a Good Choice
A bunk bed may not suit every household. Dogs with severe arthritis, weak hind legs, vision loss, seizure disorders, or a history of falling may need a low bed on the floor.
Puppies can also be poor candidates because they may chew wood, fall from the top, or struggle to use the ladder. Large dogs may create too much force for a lightweight frame.
Ask your veterinarian before using a raised bed if your dog has:
• Joint disease
• Recent surgery
• Neurologic problems
• Balance issues
• Frequent falls
• Serious fear of stairs
There is no prize for making a dog use the upper bunk. The best bed is the one your dog can reach, leave, and use without fear or pain.
Frequently Asked Questions
How much weight can a dog bunk bed hold?
The weight limit depends on the lumber, joints, support posts, platform width, and anchoring method. Build for the combined weight of the dogs plus extra force from jumping, and use center supports for wide platforms.
Is a dog bunk bed safe for puppies?
It may not be safe for young puppies because they can fall, chew the frame, or become trapped near the ladder. A low floor bed is usually a safer choice until the puppy is steady, trained, and able to climb safely.
Should I use a ramp or ladder for a dog bunk bed?
A ramp is usually better for senior dogs, dogs with arthritis, and dogs with poor balance. A ladder can work for healthy, agile dogs if its steps are wide, secure, and covered with a nonslip material.
How tall should a dog bunk bed be?
Keep the upper level as low as practical while leaving enough space for the lower dog to sit and move. The correct height depends on the dog’s size, the mattress thickness, the guardrail, and the dog’s climbing ability.
What wood is best for a dog bunk bed?
Kiln-dried pine, fir, or another sound structural wood can work for the frame. Use plywood or solid boards for the platforms, and avoid cracked, treated, rotting, or chemically contaminated wood.
How do I stop a dog bunk bed from wobbling?
Check that the floor is level, then tighten the joints and add corner braces or center supports. A tall or narrow bed may also need wall anchors to prevent tipping.
How often should I inspect a dog bunk bed?
Inspect it at least once a month and after any hard jump or move. Check screws, posts, platforms, guardrails, ladder steps, nonslip pads, and signs of cracking or moisture.
Conclusion
Learning how to build a dog bunk bed is a practical way to save space and create a custom rest area for two dogs. Start with accurate measurements, strong wood, solid joints, safe access, smooth edges, and a low center of gravity. Then test the frame before adding bedding and introduce your dog to it at a gentle pace.
The best design is not the tallest or most decorative one. It is the bed that stays firm, feels comfortable, and suits your dog’s age, size, health, and confidence. Gather your tools, make a careful cut list, and build a safe resting place your dogs can enjoy. Share your design ideas or results in the comments, and explore more DIY pet furniture guides for your next project.

Pet Care Writer & Researcher
Daniel writes practical guides on daily care, feeding, and safety, turning complex topics into simple, actionable advice.